MyMemories Forum User - Lisa J.

Topics Started

Topic Date Created
*Adding MUSIC/NARRATION to your project* 03/30/2011 09:45:03
*Tour the MMS Workscreen* 03/29/2011 07:09:27
*Clustering Made Easy* 03/28/2011 19:02:54
*Journaling Mats* 03/28/2011 19:02:13
*Using MMS to create your custom (Blogger) Blog Header* 03/26/2011 21:29:34
*Making a Designer Template Your Own* 03/23/2011 22:56:03
*Adding SHAPES to your MMS with SVG files* 03/23/2011 22:55:15
*Lettering Delights* 03/21/2011 06:46:44
*Copy & Paste* (text from outside MMS) 03/20/2011 08:59:46
*Uploading Your PHOTOBOOK for Printing* 03/19/2011 07:51:14

Posts

Post Topic Date Last Modified

Thanks SO much Shawn!! These are awesome!

Lisa J.

PHOTO tutorial Customizing Blogger Header 02/28/2011 08:57:32

Here’s an interesting little article about showing motion in your photos!  Thought it was a great little piece of information!  Find this and some other great information at Adorama.com

<3 Lisa J.


Implying Motion
by Bryan Peterson

When the camera remains stationary – usually on a firm support such as a tripod – and there are moving subjects, the photographer has the opportunity to imply motion. The resulting image will show the moving subject as a blur, while stationary objects are recorded in sharp detail. Waterfalls, streams, crashing surf, and rush hour traffic are but a few of the more obvious subjects that provide motion-filled opportunities. Choosing the right shutter speed for these motion-filled situations is oftentimes trial and error for many shooters but it doesn’t have to be.

There are certainly some general guidelines to follow for implying motion, and if nothing else, these guidelines can provide a good starting point for many of the motion-filled situations that abound. The movement of water, whether it be a waterfall, a stream or crashing surf can be easily conveyed at shutter speeds ranging from a 1/4 second to 1 second while moving traffic is usually best conveyed at the longer exposure times of 4 or 8 seconds.

Waterfall

Waterfalls are perhaps the most sought after motion-filled shot by the amateur photographer. They certainly were for me in my early days and even today, when I come upon one of them, I certainly don’t hesitate in immediately using an exposure to imply the waterfall’s motion. Silver Falls State Park in Oregon continues to be one of my favorite locations for waterfall shooting and the two best seasons are late spring or fall. In this particular image there are actually two things going on and both are working in my favor. From a low viewpoint, I have mounted my camera and Nikkor 12-24mm lens on my Bogen 190CX PRO4 tripod to take advantage of the foreground interest of autumn colored leaves and of course the flowing water. This means that in addition to using the smallest aperture of f/22, I will also be pre-setting my focus to three feet to get the maximum depth of field. Interestingly enough, at the aperture of f/22, I am now assured of recording the slowest possible exposure with the ISO of 200, which my camera is set to.


Additionally, I chose this day to come to the park since it was heavy overcast with periods of light rain and this of course means it was a ‘dark’ day in the woods which further supported my need and desire to shoot some slow exposures. And finally, as a big believer in using a polarizing filter on overcast/rainy days, (the polarizer will reduce if not eliminate the dull grey glare off of the surface of the water and surrounding fauna), the two stops of light reduction will also ‘force’ a much slower shutter speed. With my B/W 77MM polarizer in place, and with the dark overcast sky overhead, I soon discovered that at f/22 a correct exposure was indicated at 1 second. The resulting ‘long’ exposure accounts for the cotton candy like water you see here and the use of an aperture of f/22, (story-telling) accounts for the front to back sharpness. (Nikon D300, ISO 200)


Highway Traffic


It has and will always be my goal to present motion-filled opportunities in the most motion-filled way. Traffic on the highways follow a simple rule; the longer the exposure time, the greater the motion is conveyed. In our first example, and again, with camera mounted on tripod, Photo #1 was shot at f/4 for 1/2 second, while photo #2 was shot at f/16 for 8 seconds. Clearly, the longer exposure of 8 seconds results in a much more dynamic composition. Both of these exposures were made with my NIkon D-2X and Nikkor 200-400mm zoom at the focal length of 400mm, mounted on tripod with my ISO set to 100 and my WB set to Cloudy.


No doubt about it; motion filled subjects are fun to shoot! Heck I love the subject of motion so much that I wrote book about it, Understanding Shutter Speed and it was last year, in my Singapore workshop where I got an idea to add some “man-made motion” to a simple portrait. We’ll go from a pleasing, yet static background, to one that is filled with motion in as little as a 1/50 second! Check out the video link below!


All my best,
Bryan F. Peterson/Founder PPSOP.com


*P365 2/11/11 02/16/2011 17:44:18

I am always on the hunt for new and interesting information to share with you about how to create a better photograph, or HOW to get a photo you really want, to turn out right.  I read so many articles about getting the settings right, getting the lighting right and getting your angle right, etc.  I found this great article with photos and specific information about settings that you might find helpful.  Because some of these things are links or blog articles that might be hard to keep track of, I try to repost them here to share with you – I always give credit to the author/creator of the article, so you know where you might go to read more!

This is from one of our favorites: Amanda, of kevinandamanda.com – she’s not just a font fanantic like us!  She’s a great photographer and loves to share tips to help you become better too!

So, enjoy this article!  And… as always… don’t forget to make a memory today!

Lisa J.


What Settings Should I Use?
 

*If you can’t see the pictures/videos, or are having trouble  downloading files, please click here to be taken directly to the blog post! :)

http://www.feedblitz.com/t2.asp?/386922/10119821/3978814/http://www.kevinandamanda.com/whatsnew/?attachment_id=5120

I recently added a feature to this blog where you can click on a photo and see the settings I used to shoot that photo. I’m thrilled to be able to easily share this information, but I also wanted to let you guys in on two very important secrets.

1. I don’t always use the right settings.

I make mistakes. Often! Or I get lucky. Sometimes I forget to change settings from photo to photo. Sometimes I quickly point and shoot. Either way, my settings are by no means perfect, and sometimes I cringe at the thought that someone might attempt to take a similar photo using those settings. Ack!

2. Your mileage may vary.

Even if my settings were perfect and you were to go back to the exact same spot, at the exact same time, in the exact same light, and use the exact same settings… the photo would most likely not turn out exactly the same. Maybe not even close.

With that in mind, I wanted to share with you guys how you can look at a photo and replicate it. Not by knowing which exact settings were used, but which setting was the most important for that photo. Once you’ve got that one setting in place, you simply adjust the other settings to make sure the photo looks good. It doesn’t really matter what the exact numbers are. Just that they made the photo bright enough. Or sharp enough.

So how can you look at a photo and know which setting was the most important, without knowing any of the settings? In most photos you take, either the aperture or the shutter speed will be the most important setting. That’s why most cameras have Aperture Priority and Shutter Speed Priority shooting modes. But here’s the thing. It all depends what you, the viewer and the photographer, want to get out of the photo. Is it a portrait? Do you want a beautifully blurred background? Is it a scenery shot? Do you want everything sharp and in focus? Is it an action shot? Do you need to be able to “freeze” action in the photo?

I’ve rounded up a few of my favorite types of photos to shoot, the ones you’re most likely to see around here. Below I’ll show you which setting was the most important for each one and walk you through my thought process for taking the photo. (Careful! My mind’s a scary place.) So that next time, even though you might not use the exact same settings, you’ll still be able to take a photo and get exactly what you want out of it.

Canon 85mm 1.8
f/1.8
1/40 sec
1600 ISO

Aperture.

What did I want out of this photo? Bokeh. I wanted the lights on the Christmas tree blurred in the background. So for this photo, the most important setting was aperture. I put the camera in Manual and set the aperture as low as it would go, 1.8. To replicate this photo, start by setting your aperture as low as it will go, then bump down the shutter speed – this will allow your camera to let in more light – until the photo is bright enough for your liking.

Tip: Make sure your shutter speed doesn’t get too much below 50 (it’s 40 here). If it does, your photo might suffer from blurriness caused by camera shake. If you’ve bumped it down to 50 and your photo isn’t bright enough, tried bumping up your ISO to allow in more light.

For a quick review of aperture, shutter speed, exposure, and ISO, check out part one of this tutorial: A Quick Guide to Understanding Your DSLR Camera.

Canon 100mm f/2.8 Macro
f/4
1/125 sec
ISO 2000

Aperture.

What did I want out of this photo? Bokeh, again. But this time, bumping the aperture all the way down to 2.8 (as low as this lens will go) was too much bokeh. Try bumping up your aperture to 3.2, 4.0 or even 5.6 to see how it changes the look of your photo. Here’s a good example of the difference it can make: A Quick Comparison of Aperture & Bokeh.

For this photo, I had plenty of light, so I just put my camera in Aperture Priority mode and shot. I didn’t need to manually fiddle with the shutter speed and and ISO to allow in more light. I did, however, bump my exposure control up to +2/3 to make it nice and bright. Again, check the DSLR Quick Guide for a review on that.

Tip: If your camera has Auto ISO mode, use it!

Canon 24-70mm f/2.8
f/8
1/32 sec (I used a tripod)
ISO 125

Aperture.

Again, aperture is the most important setting in this photo. What I wanted out of this photo was for everything to be in focus. If you want everything in focus for a scenery shot, try setting your aperture between 8 and 11. This will cause your camera to allow in less light, making your photo darker, so you may need to lower your shutter speed to compensate. In this case, I had to lower it to 32 and use a tripod so my hands wouldn’t shake and cause the photo to be blurry.

Tip: A low ISO is always preferred for scenery photos, as a higher ISO can cause them to be grainy. In this case, I could’ve bumped up my ISO which would have allowed me to set my shutter speed fast enough to to hand hold the camera, but I preferred to keep my ISO low at 125 and use a tripod.

Canon 24-70mm f/2.8
f/8
1/1600 sec
ISO 100

Aperture.

Believe it or not, for this photo, aperture was the most important setting. I wanted to make sure to get the beach and the horizon in focus. I put my camera in Aperture Priority and set my aperture to 8. From there, you can play with the exposure control to adjust the lighting. At 0, you’ll get a darker sunset, like the photo above. If you bump it up a few stops, you’ll get a brighter sunset, like this:

Canon 24-70mm f/2.8
f/8
1/125 sec
ISO 100

As you can see, all it did was lower my shutter speed to allow in more light.

Which one do you prefer?

Canon 24-70mm f/2.8
f/22
6.0 sec
ISO 3200

Aperture.

One more aperture photo here. For this nighttime photo that has a ton of detail, I set my aperture as high as it will go, 22. I wanted to make sure I could get every last detail in focus. Because it was so dark, and my aperture was so high (allowing in the least amount of light as possible) I had to set my shutter speed extremely low, 6 seconds. That means you press the button, and six seconds later it’s done taking the photo. I definitely used a tripod for this shot. I also used the self-timer, so my hand wouldn’t shake the camera as I was pushing the button.

Remember what I said about not always having perfect settings? Can you see which setting I messed up on here? ISO. I should’ve lowered my ISO. My photo turned out a little grainy because I left it all the way up at 3200. However, if I’d remembered to lower it I would’ve had to set my shutter speed even slower. Who knows how long it wouldn’t taken to take the photo!

Fortunately, noise is pretty easily cleaned up in Photoshop using a plugin like DeNoise.

Canon 70-200mm f/4L
f/5
1/500 sec
ISO 100

Shutter Speed.

When you want to stop action in mid-air, shutter speed is your most important setting. For crisp action shots, I like to set my shutter speed no lower than 500. Any lower than that and you’re going to get blurriness. For this photo, I put my camera in Shutter Priority, set my shutter speed to 1/500, and since it was cloudy, I bumped my exposure control up to +1. This is my favorite setup for action shots. If it were sunny and the photos were turning out too bright, I would’ve put the exposure control back down at 0.

Canon 24-70mm f/2.8
f/22
1/4 sec
ISO 100

Shutter Speed.

This is my go-to setup for dreamy waterfall photos. The shutter speed is the most important setting here. It needs to be at least 1/4 sec or slower to blur the flow of the water. I usually shoot waterfalls in manual mode, and here’s why. Setting the shutter speed that slow allows in a lot of light. And since I’m usually taking photos of waterfalls during the day, when there’s sun, I have to bump up the aperture as high as it will go to compensate. My aperture is not up that high because I want everything in focus, although it is a nice bonus. It’s up that high because if it were any lower, like 2.8 or even 8 or 11, the photo would be completely white and blown out from too much light. My ISO is at 100 because while I do always prefer a low ISO for scenery, if it were any higher, again, it would allow in too much light and cause the photo to be too bright.

Canon 24-70mm f/2.8
f/2.8
1/100 sec
ISO 200

Exposure.

Sometimes it’s not what your settings are, but simply where you point the camera. For silhouette photos, point your camera at the brightest part of the sky. Press the shutter button halfway down to “get a light reading”. This will tell your camera that you’re taking a picture of the bright sky, and to adjust the settings accordingly. With the shutter button still pressed halfway down, reframe the photo so that the subject you want to silhouette is in the viewfinder and take the picture. If you can still see too much detail in your subject, bump down your exposure control to get a darker image and try again.

Check out my settings here. Ideally, I would’ve used a higher aperture, in the 8-11 range, to ensure that both the palm tree and the horizon were in focus. I forgot. However, doing that would’ve allowed in less light. I would’ve had to bump up my ISO to compensate, and that might have caused graininess in the photo. Something to think about.

Fortunately, everything’s in focus here. Tip: If your subject is out of focus, check your aperture and consider using a higher one. Bokeh, when you didn’t mean for it to be there, is just plain blurriness.


Unsubscribe safely and securely now if you wish.


Otherwise, please add our e-mail address, http://assets.feedblitz.com/feedblitz.vcf, to your AOL address book. If this message is in your spam or bulk folder and you want to keep it, please click your “Not Spam” button now.


© kevinandamanda.com, 2011. | Leave a comment! | Stumble | Share on Twitter | Share on Facebook

*P365 2/10/11 02/14/2011 14:01:22

Good evening – back at it today and making sure I am seeking out some great ideas to keep you motivated on your 365 Day journey to grow your photography skills and collections.  There are so many great things to focus on (pardon the pun) that it’s hard to narrow down to just one per day – but since I have a WHOLE year, sometimes I just make a note of different things that interest me to share with you.  Today’s post is another great tip from Digital Photography School – and I thought this one was a great idea.  There are so many ways to approach a large project and it helps to give it a direction!  So check this one out and see what you think!  Please feel free to email me with some of YOUR tips and tricks so I can share them with everyone!

Lisa J.

[email protected]

7 Photography Projects to Jumpstart your Creativity


In this post Jennifer Jacobs from iffles.com shares some tips on how to spark creativity in your photography.


Image by kk+

Image by kk+

Let’s face it, no matter how much we take our camera out, there’s only so many pictures we can take of our kids, pets, house and garden before we start itching to shoot something else… but what?

Hopefully this list of projects you can undertake will inspire you to find something creative to shoot.

1. 365 Days

The most popular of the projects on this list, there are multiple variations of the 365 project.  Typically, it involves taking a self-portrait every day for a year – the only rule is that you have to hit the shutter button (or remote) and at least some part of you must be in the photo.  It doesn’t sound so bad at first, but believe me, there’s only so many photos you can take holding the camera at arms length before even you get bored.  Suddenly you find yourself doing things like wrapping yourself in christmas lights, jumping in piles of leaves, or taping your mouth shut.  For inspiration, check out the 365 Days group on flickr.

365days.jpg

If a photo-a-day seems like too much of a commitment, you can do one self-portrait a week for a year – a 52 Weeks project.

If the self-portrait part makes you a bit squeamish, you can either round up the kids and get pictures of them everyday for a 365 kids project, or you can just do a open-topic 365 project where you just have to take a picture of anything every day for a year.
 

2. 52 Photowalks

I use the term “photowalk” pretty loosely here.   While photowalks often include groups of people walking through cities together, all capturing images of the same landmarks from their own point of view, I’m being slightly more liberal with the term.

Basically, I’m saying you should get out of the house once a week with your camera.  I looked through all my photos from my first year with my DSLR and realized about 90% of them were in or around my house.  So I got up and walked out the door once a week. I’ve been to local parks, abandoned buildings (careful with this one: it can be frowned upon or even illegal to poke around some abandoned buildings), downtown and other small towns near me.

52photowalks.jpg

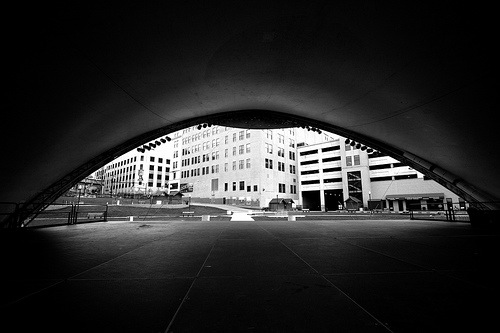
Besides adding a bigger variety to my photo collection, I’ve noticed two other side effects from this project so far: I’ve discovered all sorts of parks and areas of downtown that I didn’t even know existed, and I’ve been able to go to places that I already knew and see them from a totally different viewpoint.  For instance, the picture above is of a local amphitheater.  I’ve been there a number of times and never thought much of it… but being there when the park was empty, and walking to the back of the stage looking out has given me a completely different perspective.


3. 100 Strangers

This is a project I personally don’t have the guts to do, as I’m bit shy (that’s the whole reason why I’m behind the lens to begin with!), but I know some people doing this project and I’m loving their results so far.  The idea is to approach someone you’ve never met before, ask if you can take their picture, and talk to them a bit to get some kind of backstory, and then upload the photo (and a short description of who they are and what you talked about) to flickr and add it to the 100 Strangers group.  Then repeat 99 more times.  

Not only will get photos of different people in your collection, but you just might make a new friend or two. You can, of course, skip the flickr part and do this project on your own, but you would gain a lot of inspiration from the group.

4. A-Z

Once again, there’s a couple ways you can go with an A-Z project.  You can pick a place and try to get a picture of objects that start with or represent each letter of the alphabet (for instance, it might be easy to take a photo of the grass for G, but Q is going to be harder, maybe a picture of a kid running around could be Quick, or a picture of a completely still pond could be Quiet).  You can also try this with numbers, too – take a photo of one acorn on the ground, two ducks by a pond, three trees grouped together, etc.

a-z.jpg

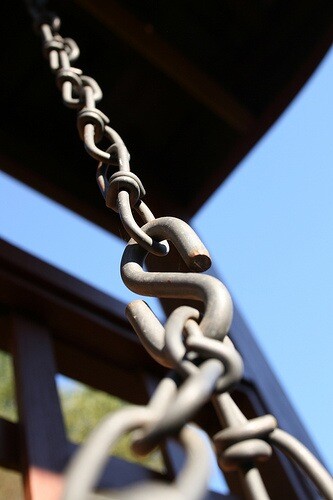
The other interpretation of this project is to take pictures of things that look like the letters A-Z.  Take a look at the photo above, it’s actually a chain to a porch swing, but the one piece looks like a letter S.  Once you start this project you’ll start looking at ordinary things – buildings, cloud formations, playground equipment, etc. – in a complete different way, giving you a new perspective on things to photograph.  This project can also be done with numbers, too.

5. Pick-A-Something

Pick something and try to get a collection of photos representing it.  For instance, pick a color and try to go all day photographing only red things, or try only getting pictures of things that are square when you’re on a walk.  I was once at a cookout and, while I took photos of other things, I also tried to get  photos of people’s shoes.  

pick-a-something.jpg

The upside of this project is that it, once again, gets you to start seeing ordinary things in different way – taking a snapshot looking down at everyone’s shoes is going to start to get boring, so it forces you to start thinking creatively.  The downside of this project is that people are going to start giving you weird looks for crawling around on the ground taking pictures of shoes while everyone else is enjoying hamburgers and potato salad.

6. Go Mono

During my 365 (open-topic, not self-portraits), I decided to take one month and do all my photos in black-and-white.  My goal was to get better at converting photos to black and white, which I think I did, but I noticed I was also starting to see things differently, and figure out what photos would look better in mono, and which ones wouldn’t.  

gomono.jpg

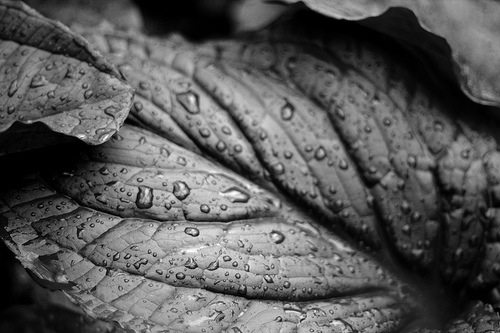
There were also a few surprises, like the leaf with water drops on it that you see above.  If I hadn’t been doing a month of mono, I would have edited that photo in color and loved it, and left it like that.  But I converted it for my 365 project, and I loved it even more.  Surprises like that made the whole month worth it.

7. Scavenger Hunt

A photo scavenger hunt is simple. You need someone to come up with a list of things to photograph (they can be actually things like “railroad tracks”, or they can be more conceptual like “fun with friends”, or even techniques like “shallow depth of field”). Then, a group of people all go out and interpret the list how they want and show them to the group.  As with a lot of the other projects I mentioned, it really gets you to start looking at ordinary things in a different way.  Looking for a list?  Do a search in the flickr groups for “scavenger hunt” and you’ll come up with a number of groups that have hunts going on.  Including a DPS Scavenger Hunt group, made up of other DPS users that posts a new list each month.

PS from Darren: Also check out our weekly Assignments in the DPS forums for a little inspiration – we nominate a topic for each week for everyone to take a photo on – it can be a lot of fun and a great way to get out of a creative rut!

headshot.jpgAbout the Author: Jennifer Jacobs is an amateur photographer who runs iffles.com – a site for photography beginners.  She’s also addicted to flickr and you can follow her stream here.


Read more: http://www.digital-photography-school.com/7-photography-projects-to-jumpstart-your-creativity#ixzz1DVRIYALL

*P365 2/9/11 02/09/2011 16:09:28

Hi Menda!  We were just talking about this over the weekend too!  Someone suggested that maybe there wasn’t anyone left in the family to pass the photos along to.  Isn’t that sad… made me sad too!

Thanks for sharing your stories Menda!

Lisa J.

The Story behind My Vintage Photos 02/08/2011 19:20:40

No problem at all!  I’m here to help!! :-)


Lisa J.

embellishments 02/08/2011 19:15:39

Hi again!  It’s ME!!  Back to share another little article I found that might be helpful in your photographic YEAR LONG journey!  It’s a LONG time, but there is SO  much to learn and grow into that this is just a step along the way.  I can’t begin to tell you how much I wish I could go back to recapture some of the moments of my children’s earlier birthday’s and Christmases – now that I know a little bit more about photographing than I did then.  But, that’s not to be – so I am determined to learn ALL I can about it, so in the future (the WAY WAY off future!) when I have grandchildren running around, that I will be good enough then.  I say that is my goal – to grow along the way, and capture my kiddos teenage years, their boyfriends, girlfriends, and the precious exciting moments of my babies, who are not babies anymore.  I treasure these days – each and every one, and I don’t want to miss a thing.

But – if your babies are still babies,  then don’t wait – learn how to capture those days now – they will be gone LONG before you are ready! 

Here is a great article I found on “How to Photograph Children” – thought you might find it helpful!  Read… absorb… enjoy! 

and don’t forget to make a memory today!

Lisa J.

[email protected]

Check this one from Digital Photography School out!  It’s awesome!


Photographing Children – Composition

0
del.icio.us 
StumbleUpon 
Digg 

Composition-KidsI thoroughly enjoy photographing children and have opportunity to do quite a bit of it lately after many of our friends have had babies.

Probably the most important tip I’ve learned in photographing them is to get on their level. So many of my friends show me photos of their kids which are taken from 4 or so feet above the child which does nothing but dwarf them and make them look almost toy-like.

Getting on your hands and knees or crouching down before you take a shot of a child takes you into their world and helps you to engage with them through the images you take.

Photographing Babies

Babies are particularly difficult to photograph because they are so immobile. I find that one of the best ways to get good shots of them is to put them on a baby rug and too literally lie down next to them with your camera right on the floor. In this way you’re looking directly into their big beautiful eyes and it puts the viewer of the photo in the unique perspective of an eye to eye place. If the child has the ability to lift it’s head the effects can be amazing as you almost find yourself looking UP into their eyes.

Composition-Kids-2
 
Photographing Older Children

 The same principle of getting down low applies with older children although you do have a little less lying on the floor with them when they are at an age of walking.

I particularly find that with older children the best time to photograph them is when they are doing something that they enjoy. Go to the park with them and their parents, visit their house when they are painting pictures, get them to take you on a tour of their room or take them out to play their favorite sport.

While they are doing their activity hover around (at their level) and take plenty of shots. Also include shots with them and their parents and keep an eye open for those candid moments when they fall over, do funny expressions or ham it up for the camera.

If your camera has a continuous shooting mode it might also be worth keeping that on with bigger kids who tend to move around more. As I look back at the times I’ve done this it’s quite interesting to see that it’s often the second or third shot in a sequence that is best. Shooting just one frame at a time can mean you miss these golden opportunities.

Another benefit of continuous shooting is that you can end up with a great series of shots that might go nicely together to tell a story (see below).


Img 815Composition-Kids-3Img 817

Change your Focal Length

Another great way to change the angles of your shots when photographing kids is to use different focal lengths. If you’re using a DSLR it might be worth investing in a couple of different lenses (a wide angle one and a longer zoom) to give you different options. If you’re using a point and shoot (most of which have at least a 3x Optical Zoom) make sure you use it.

Taking pictures with a wide angle focal length can be particularly effective when getting in close to children. It opens up the angles and gives all kinds of interesting perspectives. I use a 17-40mm zoom lens on my DSLR which is brilliant for this. It still allows me to zoom in a little but at 17mm the impact is amazing.

A zoom lens allows you to take photos from further afield and will particularly be useful if the child is distracted by you taking photos. I use a 70-200mm zoom (the third image above was taken with it) which I find very useful.

Have Fun


Lastly, the key to good kid shots is to rediscover your own inner child. Kids love to have fun, they do the unexpected, they love to experiment and test things out and they love to play. Approach photographing them in this spirit and you’ll find your pictures take on a wonderful childlike quality.


Read more: http://www.digital-photography-school.com/photographing-children-composition#ixzz1DKV5vADL

*P365 - 2/8/11 02/07/2011 19:11:11

Hi again!  I have heard it said that the most telling giveaway that a photograph was taken by an amateur rather than a pro is the distance the photographer is from the subject.  Think about it – when you snap a picture, do you focus on the whole scene from a distance, or get up close and personal and really capture the looks on the faces of those you love?  Which is really more important?  Well, of course if you are visiting Paris for the first time, you will want to get 1000 shots of the Eiffel tower – but chances are, they’ll look like every other photo ever taken of the Eiffel tower.  BUT, if you take a photograph of your husband or wife – with just the texture of the base in the background to go with that area shot, well, who else can create that?  THAT belongs just to you.  So, remember, while it is sometimes important to get wide shots, get everything in there – don’t forget that you WILL want photos of those summer freckles, that lost tooth – that big set of baby blues to fill up the WHOLE frame.  It’s all about the moment captured in that face, in those eyes that we can’t forget.

Here’s a great little article from Adorama.com – a great site for photographers of every skill level.  They have tutorials and great information about equipment too!

Here is the article – check it out and see what you think!

… and don’t forget to make a memory today!

Lisa J.

[email protected]


Fill the frame when shooting a portrait: Fix the Pix, Episode 7


Are you ready for your close-up?


By Mason Resnick


September 16, 2009

The trouble with people pictures is most photographers don’t get close enough. Look at the difference a more intimate approach can make!


Today’s Fix the Pix was photographed using a Panasonic Lumix DMC-ZR1.

“Far out!” is not the exclamation of hippy-dippy joy when it comes to portrait photos of your loved ones. Instead, it’s a complaint: I can’t see Aunt Sadie because you were too “far out” when you photographed her. How can you avoid too much space around a face?

It’s really great that so many new compact digital cameras are available these days with zoom lenses that start at 28 or 24mm. This is really helpful when shooting scenic vistas or photographing large groups of people in tight spaces. It’s not so helpful when you want to get a nice close portrait of someone.


Deceptive distance: I shot this at 24mm with a brand-new Panasonic Lumix DMC-ZR1. We were standing about 8 feet from each other, but my daughter seems so much farther away!


Better: I zoomed in to the equivalent of a 70mm view, but the red tail light of the car in the background and the bright steps on the right draw my eye away from the subject.

1.    Move closer. Zoom with your feet. When photographing someone, stand within ten feet of them.
2.    Use a moderate telephoto setting. Around 70mm should do it. If you have a 3x zoom lens, zoom it almost all the way out. Shooting at close range with a telephoto setting, the background will be more out of focus and less distracting. To avoid camera shake, make sure shake reduction is turned on.


Don’t be afraid to fill the frame, and even to cut off the top of your subject’s head. For this shot, I took a couple of steps towards my daughter, and composed vertically. By zooming in on your subject, you can get a more dramatic portrait. Bonus: The closer you get, the less chance that you’ll have a distracting background.


A fun twist: If you’re getting up super-close, try tilting the camera slightly. The off-kilter diagonal approach is more dynamic and fun.

*P365 2/7/11 02/07/2011 18:35:56

Hi again!  How’s everyone doing?  How is the P365 coming along?  Even if you aren’t able to keep up with your “photo a day – EVERY day” are you at least learning some new things about what you want from your photos, and what it is that makes you so passionate about collecting the memories you are making photographically?  First it’s important to remember, that even if the only photos you ever take are with the camera on your phone – you at least have something to treasure, something to keep, something to pass down.  THAT is the most important thing.  In the years to come, people will want to know you, what you did, what your family did – your kids will want to pass things down to their kids.  Remember to create those keepsakes NOW.  Even if you NEVER scrap a page, it is important to save the photos.  Do it, you CAN make it happen.  We are ALL busy, we are ALL overwhelmed with the lives we lead!  I have a crazy life myself – I started out with the best of intentions to photograph ever day this year… well, didn’t quite get all that done – missed a few days in January, will probably miss some every month, but I’m trying hard NOT TO GIVE UP!  So, don’t you give up either!

Today’s note is about perspective.  Some of the most interesting photography is from an unusual perspective.  Try to remember that, especially if your children are still small, things look VERY different from their view of the world.  It’s important to remember that – even (if they are old enough) hand the camera to them sometimes – kids LOVE to take photos!!  Add some of their work to your collection – they will be so proud and you will enjoy the different point of view as well!

Here is a great article about capturing photos from a lower level – check it out and see what you thinK!

and don’t forget to make a memory today!

Lisa J.

[email protected]

(this article can be found at Digital Photography School!)  They have a TON more, from beginner to pro – check them out!!


7 Tips For Great Low Angle Shots

48
del.icio.us 
StumbleUpon 
Digg 

Copyright By Socceraholic

Low angle shots give us a different view on the world. Most of our lives are spent well above ground level and by the time we are teenagers we rarely spend much time down low any more. Yet there is a whole world down there!! Plus the forced perspective brings a boring, everyday scene into new light when done right. So what are some tips on taking great low angle shots?


(NOTE: While low angle photography can technically include shots simply looking up at tall items, I am intent on highlighting the reverse, dropping your camera down low to force perspective.)


Ignore Your Viewfinder

The first step in low angle is accepting you will not be able to look through your viewfinder most of the time. A lot of shots require the camera in such an angle that only the smallest of frogs could take a peek. If your camera has a flipout view screen, you will be thanking your lucky stars. If not, get used to having to go by sense of feel on this one.


Learn Your Angle

Low angle shots work best with a wider lens. Something in the 10-22mm range for 1.6 crop factor cameras works quite well. Fisheye lenses can also be handy. This is not to say a zoom doesn’t do the job if you can lay on your belly and frame things. It is just much harder to crop the image right in the filed of view that it will be with a wider zoom. Although three is no reason you can’t have it both ways and opt for something like a 18-200mm zoom which will allow for a lot of room to play.


Understand Aperture and Depth Of Field

A low angle shot is going to have objects near and far. That is part of its appeal, being able to show the perspective by including foreground objects. This means you will need to understand your camera and lens combination’s sweet spot for aperture. Cranking the f-stop up as high as it will go does not insure perfect depth of of field front to back. Each lens has positive and negative aspects this approach and it is best to learn where your lens performs best, then use that setting (via a Aperture Priority mode). Even better, some cameras have a Depth Of Field mode, which will do its darndest to hold as much of the image in focus as it can, by correlating both aperture and focus points.


Keep It All Level

When you bring the camera close to the ground or other low object, take an extra second to insure your camera is level. This will save time in front of the computer realigning everything. It may not seem like a big deal at the time, but if you want to use this technique again and again, it’s best to learn leveling early. It can be a huge time saver in the long run.
The good news is, if you can’t get it perfect, there always is the computer to make it nice and level. I simply prefer to get it right in the camera the first time around, even if it means a lot of trial and error to learn.


Preventing Blown Out Skies

It may be a sunny day and all your shots are coming out well. A nice balance of light and the exposure seems to be spot on…until you go for a low shot. The foreground is dark and the sky is not that well defined. What’s happening?
If your low angle shot is including a lot of sky, and it is a bright day, you will need to compensate or, possibly, accept the limits of the scene in front of you. Shooting up and near the sun will make your camera squint with all its might, just like you would if you were laying on the ground looking partially into the sun. To compensate, take a pick between the dark and the light and go for it. If you want a lot of sky or cloud to be defined, underexpose. If the foreground is too precious to you to let go, overexpose and accept that the sky will be blown out. But at least you can capture the aspect that is most important to you.


Positioning Objects In The Frame

Imagine the scene from down low before taking the shot. Just like eye level photographs, frame the scene to include something of interest. Maybe it’s just a rock, or an apple or anything. This is a chance to make the mundane appear huge by perspective. Because of the angle, nearby objects will be exaggerated in their size. Play around with it.


Shoot, Review, Repeat

This is where digital is a boon to the photographer. While I’m not a fan of reviewing every shot on a camera’s view screen, learning from your mistakes has never been easier than with the digital revolution. Use it! Take a shot and see what can be changed, either with exposure or composition, and try, try again until the shot you want is captured.
Just don’t forget to delete the dozens of attempts that failed before you get home to download.

Low angle photography can be a fun way to spice things up in your picture taking world. Don’t be afraid to experiment and see the world from another point of view!


Read more: http://www.digital-photography-school.com/7-tips-for-great-low-angle-shots#ixzz1DKFeiZZQ

*P365 2/6/11 02/07/2011 18:17:25

Here’s a fun little “daily” project you could do for yourself, or for your family!  There are some fun ideas here at PhotoJojo.com.  Now some of the instructions here are given to set up your page in another program – and surely we know it can be a LOT less work in a program like MMS.  So, to set up your page, just create a layout with a photo box the size you like, and then duplicate it as many times as you need to create the number of “faces” you want on your page.  It’s fun and easy.  Use the alignment tools to make sure your boxes are lined up, or arrange them a little tilted for a fun look!  

Here’s the article with the idea – and you can take it from there!

Hope you have a great weekend!  

and don’t forget to make a memory today!

Lisa J.

[email protected]


Make a Daily Profile Photo…For Your Fridge!

 
Extra photos for bloggers: 123


It’s inevitable; sooner or later (probably sooner) you’ll find yourself trapped in the dreaded Fridge Zone: forever peering into an open fridge pondering “What am I in the mood for?”

There is only one way out of The Zone; you gotta dig deep and discover your mood…with photography!

Get in some acting practice, snap some photos and make a handy magnetic go-to-guide of your emotions.

You’ll be wearing your heart on your sleeve and your mood on your fridge.

How To Make a Daily Photo Emoto-Magnet


WHY IT’S COOL

beforeYour expressions are as classic as an A+ on your mom’s refrigerator.

Put your face front and center with an awesome magnetic spectrum of your emotions. It’s got a grid of your many moods and a magnetic frame to announce your current temperament.

Turning your photos into magnets is easier than mac n’ cheese. So go make some faces and we’ll teach you a new way to express your magnetic personality.

LIST ALERT:

before

  • A camera with a tripod (or a friend)
  • An expressive face
  • Magnetic inkjet paper (easy to find at office supply stores)
  • Photoshop (or something similar)
  • Colored paper
  • Scissors and an x-acto knife
  • Ruler
  • Glue

STEP 1: READY, AIM

beforeLoosen up and get ready to take the stage.

Find a good, sturdy, blank wall to stand in front of. Set up your tripod and/or friend then put some tape on the floor so they stay in the same spot for the whole photo shoot.

Set your camera to manual or aperture/ shutter priority so that all of your photos have the same settings (to keep their chart worthy uniformity in top form).

STEP 2: FIRE!

beforeTake as many photos as you need to capture all of the emotions you want to have on your emoto-magnet: 16 is a good number.

Might we suggest as a starting point: happy, sad, afraid, excited, surprised, hopeful, angry, meh, tired, hyper, anxious, peaceful, disheveled, confused, confident, and hip.

It’s easy to get carried away here but you can always edit them down later.

STEP 3: NOW TO THE (DIGITAL) DRAWING BOARD!

beforeOpen up Photoshop (or the program of your choice) and import all of the photos that made the cut.

Do any necessary editing and crop each picture to 1”x 1”

STEP 4: OPEN UP A CLEAN SLATE

beforeOpen a new file that is big enough to hold your grid.

If you are using 16 photos you’ll need a file that is 5.75”x 6.75”.

STEP 5: GO GRAPH PAPER ON THAT FILE

beforeNow we need to set up a bunch of guides to keep everybody lined up and spaced out (think high school choir).

To make a guide simply click on the ruler and drag your mouse either down or to the left. The math here sounds a little tricky but you’re a smart cookie!

First, make a guide that sits ½” in from the edge all the way around. Second, make a new vertical guide an inch in to the right from the border. Then, make another vertical guide a quarter inch to the right of that guide. Make a third vertical guide an inch to the right from the newest guide…

Keep it up, inch then quarter, inch, quarter – until you hit the other side. For the horizontal guides the pattern is inch, quarter inch, quarter inch; inch, quarter, quarter. That extra quarter is for our super important text labels. Savvy?

STEP 6: DRAG AND DROP IT LIKE IT’S HOT

beforeOnce it’s all charted out, make sure “snap to guides” (in the View menu) is turned on and then drag each photo into your grid file and snap the pictures into the grid – so e-zee!

STEP 7: USE YOUR WORDS.

beforeUse the text tool to write a description underneath each picture.

You left yourself a 1”x ¼” space for this which should be perfect for a 12 or 14 point font.

STEP 8: PRINT IT BABY, PRINT IT!

beforePrint out your grid on your super cool magnetic paper.

You can place a black border around your grid in Photoshop to tell you where the edges are before printing.

Once your magnetic paper prints, trim it down to size.

STEP 9: FUN WITH COLORS AND SHAPES

beforePick a color from your stack of color paper.

Glue the colored paper you choose to a blank sheet of magnet paper. Then, draw and cut out a fun shape that is at least 1 ½” x 1 ¾”.

With your steadiest hand measure and cut a rectangle to the measure of 1”x 1 ¼” in the middle. Now you have a window into your emotional well being. Oh why, hello there!

If you got carried away and the grid is huge you can print it in pieces or on cardstock and hold it up with magnets on each corner.

STEP 10: SPELL IT OUT

beforeTake your most favoritest pen and write something like “Today I feel” or “Scott feels” or “I’m feelin’” or what have you across the top of the colored shape.

And look at that, you’ve got a fancy-pants selector piece.

STEP 11: POST YOUR STATUS TO YOUR FRIDGE!

beforeStick that puppy on the fridge, a filing cabinet, or your jet pack, and start showing the world how you feel!

WANT SOME MORE?

before

  • Use the photos from this photo shoot as your digital profile pictures. Change them like you change your mood (and your sweater vests).
  • Make a magnet frame for your roomies/family (with their name on it) so you can keep tabs of
    each others’ emotional state.
  • Make copies for all the fridges out there that need a bit of you to cheer them up (like your mom’s…you really should give her a call).
  • If you’ve got kiddos in your life – have them take turns making expressions and make a collage chart of their cute little faces in the same fashion.
  • Don’t have Photoshop? You can do the same thing with printed photos, a ruler, some scissors and glue. Cut and paste old school – then cover the whole thing with a thin layer of clear contact paper to keep it looking fresh.

*P365 2/5/11 02/07/2011 18:01:50